Avoid Lost Scans: 4 Step Patient Workflow to Organize Imaging CDs
Use a 4 step patient workflow of copy, verify, view and migrate to preserve full DICOM metadata and store scans in HIPAA ready cloud storage.
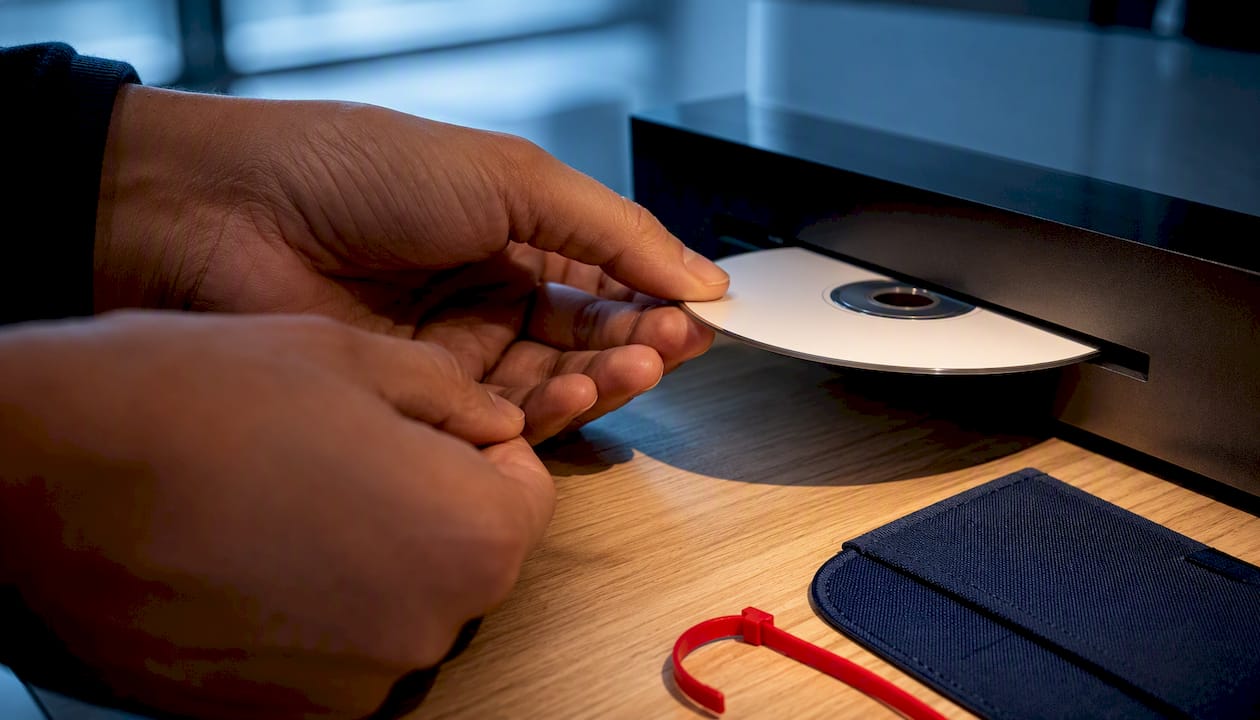
Avoid Lost Scans: 4 Step Patient Workflow to Organize Imaging CDs
Copy the DICOM folder from your CD straight to your computer, skip the disc’s launcher program entirely, and confirm the patient name and exam date match before you do anything else. Once verified, move that copy into a HIPAA-ready cloud account or an encrypted backup drive that keeps the original files intact. If the disc won’t open or the labels look wrong, stop and call the imaging center for a replacement. That’s the whole job: copy, verify, secure, done.
TL;DR:
- Copy the entire DICOM folder from the disc to a secure local or cloud storage, ensuring the original remains unaltered for backup.
- Verify the patient name, date of birth, and exam date against available reports before importing or sharing files.
- Use a DICOM viewer or a browser-based tool to preview images from the copied folder, not from the disc’s outdated launcher.
- Long-term storage should prioritize HIPAA-compliant, encrypted archiving with consistent naming, avoiding reliance on the physically degrading optical disc.
- Share images via secure portals or encrypted links, including relevant study details, to ensure privacy and factual clarity during clinical review.
Table of Contents
- What You Need Before You Start Organizing Medical Imaging CDs
- How Do You Copy DICOM Files off an Imaging CD Safely?
- What’s the Best Way to View DICOM Images from a CD?
- How Should You Store Medical Imaging Files Long Term?
- How Do You Share Medical Images Securely with a Doctor?
- What Do You Do If an Imaging CD Won’t Open?
- Why Migrating Off CDs Actually Improves Your Care
- Store, Preserve, and Share Your Scans with MedFiles.ai
- Sources
- FAQ
What You Need Before You Start Organizing Medical Imaging CDs
Gather a few things before you touch the disc. Skipping this step is the number one reason people end up re-doing the work twice.
- A computer with a CD/DVD drive, or a cheap USB external optical drive if your laptop doesn’t have one built in.
- Free disk space. Most CT and MRI studies run a few hundred megabytes to a couple of gigabytes, so a modest amount of free space covers you.
- A blank folder or USB drive for your working copy, plus a HIPAA-ready cloud account or encrypted external drive for the permanent copy.
- A DICOM-capable viewer, or a plan to use a browser-based viewer or hospital portal instead.
- The patient’s name, date of birth, and the radiology report if you have one, so you can check the files against something real.
Nothing on this list should cost you more than $30 or 20 minutes to set up, and you’ll only need to do it once.
How Do You Copy DICOM Files off an Imaging CD Safely?
Do not double-click the disc’s launcher program. Most imaging CDs ship with an old .exe viewer that was outdated the day it was burned, and running it directly from the disc means every click is limited by a slow optical drive that can skip, lag, or fail outright. Copying the DICOM folder to your hard drive first avoids that entirely and gives you a stable copy to work from.
Here’s the actual process:
- Insert the disc and open it as a folder, not through any auto-launch prompt. Look for a folder named DICOM or a file called DICOMDIR. That’s your real data.
- Drag the entire DICOM folder (not just a few files) onto your desktop or a dedicated folder on your hard drive. This preserves the internal structure the images need.
- Open the copy in a lightweight viewer or drag it into a browser-based tool to check the patient name, date of birth, and exam date against what you expect to see.
- If something doesn’t match, or the folder is empty, corrupted, or only contains a stray .exe, stop before importing anything further.
Clinical teams that import outside images run the same check for a reason. One study of hospital imports found a small but real wrong-patient rate on physical media, which is why identity verification happens before the data ever gets treated as trustworthy. You’re doing the same check, just for your own family.
Pro Tip: Keep the original disc copy untouched in one folder, and only edit or rename a second, separate copy. If anything goes wrong, you can always start over from the untouched original.
What’s the Best Way to View DICOM Images from a CD?
Ask the imaging facility if they offer a secure download or patient portal link first. It’s often the cleanest option, since it sidesteps disc problems entirely and gives you a file structure clinicians already trust.
If that’s not available, you have three practical paths:
- Browser-based viewers let you drag the copied DICOM folder into a web page and preview it locally, without uploading anything to a server. Client-side viewers work well for a quick look at a knee MRI or chest CT.
- Installed DICOM viewers read the full DICOMDIR structure and work offline, which matters if you’re somewhere without reliable internet.
- Hospital or clinic portals sometimes accept a direct upload of your copied folder, which can save a step if you’re sending images to a new provider.
Whichever route you choose, point the viewer at your copied folder, never at the disc itself. If you need to send the study anywhere, export it as a ZIP file or a protected share package, and attach a short note with the study date and report so the receiving clinician isn’t guessing what they’re looking at.
How Should You Store Medical Imaging Files Long Term?
A CD is not a filing cabinet. Optical discs degrade, drives disappear from laptops, and the proprietary viewers some facilities burn onto the disc often stop working within a few operating system updates. Treat the disc as a temporary handoff, not your archive.
What matters most for long-term storage is keeping the full DICOM detail intact. That means the original headers, series information, and image data, not a flattened JPEG export that loses the metadata a radiologist would need for comparison years later.
A minimum security checklist looks like this:
- HIPAA-ready cloud storage or a properly encrypted local drive, never an unprotected shared folder.
- End-to-end encryption both in transit and at rest.
- Access controls, so only the people you choose can open the files.
- An audit trail showing who accessed or shared the study and when.
A simple naming convention saves you hours later. Something like 2026-03-14_MRI_LeftKnee tells you everything at a glance, and you should keep the original DICOM folder inside that structure as an unmodified copy, not repacked or renamed internally.
Back everything up twice: one encrypted cloud copy, one encrypted local or offline drive, with a note somewhere listing exactly where each copy lives. This isn’t excessive caution. Hospitals importing outside images have seen storage volumes climb into the terabytes per year as CD-based exchange keeps growing, and if institutions need a real backup plan for that volume, your family’s handful of studies deserves the same discipline. Storing your images online with a service built to preserve DICOM detail solves most of this in one step.
How Do You Share Medical Images Securely with a Doctor?
Skip email for anything containing protected health information. A secure portal link or a HIPAA-ready share link keeps the DICOM structure intact and doesn’t sit in someone’s inbox indefinitely.
When you send a study, include three things: the radiology report if you have one, the study date, and a plain-language note explaining what you need. Something like “requesting a second opinion on the left knee MRI from March, report attached” tells the clinician exactly what to expect before they open a single image.
- If you’re sending a ZIP file or handing over a USB drive, encrypt it and send the password through a separate channel like text message.
- Keep a simple log of who received the files and when, especially if you’re coordinating between multiple specialists.
- If the receiving clinician needs the study inside their own PACS system, ask directly whether they want a DICOM export or a secure download link they can import themselves.
Pro Tip: A one-line message with the study date and reason for sharing gets a faster response than the files alone. Radiologists triage requests, and context moves you up the queue. MedFiles.ai’s secure sharing tools are built around exactly this kind of clinician-ready handoff.
What Do You Do If an Imaging CD Won’t Open?
Most disc problems have a fast fix if you follow the right order.
- Disc won’t mount at all? Try a different computer or a cheap external USB optical drive before assuming the disc is dead. If it still won’t read, call the imaging center and ask for a re-burn or a digital download instead.
- Disc opens but only runs an old .exe viewer? Ignore it. Copy the DICOM folder directly and open it in a modern viewer or browser-based tool instead of fighting with software that predates your operating system.
- Disc shows the wrong patient, or multiple patients mixed together? Don’t try to sort it out yourself. Contact the imaging center immediately. Identity mix-ups on physical media need to be resolved at the source, not patched locally.
- Clinician can’t open the files you sent? Repackage your copied folder into a secure share link or an encrypted ZIP, and include clear metadata in your message so they know what they’re receiving before they open it.
Why Migrating Off CDs Actually Improves Your Care
Getting your studies off a disc and into a verified digital archive isn’t just tidiness. It changes what happens the next time you’re in an exam room. A radiologist with instant access to your last MRI doesn’t need to order a new one just to have something to compare against, and that alone cuts down on repeat imaging and repeat costs. It also means a second opinion or an emergency room visit doesn’t hinge on whether you remembered to bring a disc that might not even read correctly on their machines.
Keep the original CD for a while as a backup. But treat the verified digital copy, not the disc, as your actual medical record going forward.
— Team
Store, Preserve, and Share Your Scans with MedFiles.ai
Once you’ve copied a study off its disc, the next problem is usually where it lives permanently, and most people end up with scattered folders across old laptops and email attachments nobody can find again. MedFiles.ai gives you one HIPAA-ready home for every scan, built to keep the full DICOM detail intact rather than flattening it into a low-resolution image.
Upload works the way you’d expect: create a free account, drop in the DICOM folder you already copied, and the platform organizes it alongside your other records instead of leaving it as a mystery file. Multi-profile management means you can keep a parent’s knee MRI and a child’s chest X-ray separate but accessible from the same login, and secure share links let you send a study to a new specialist without emailing PHI or handing over a USB drive. Set up a second encrypted backup once your images are in, and you’ve covered both the primary storage and the redundancy step outlined above.
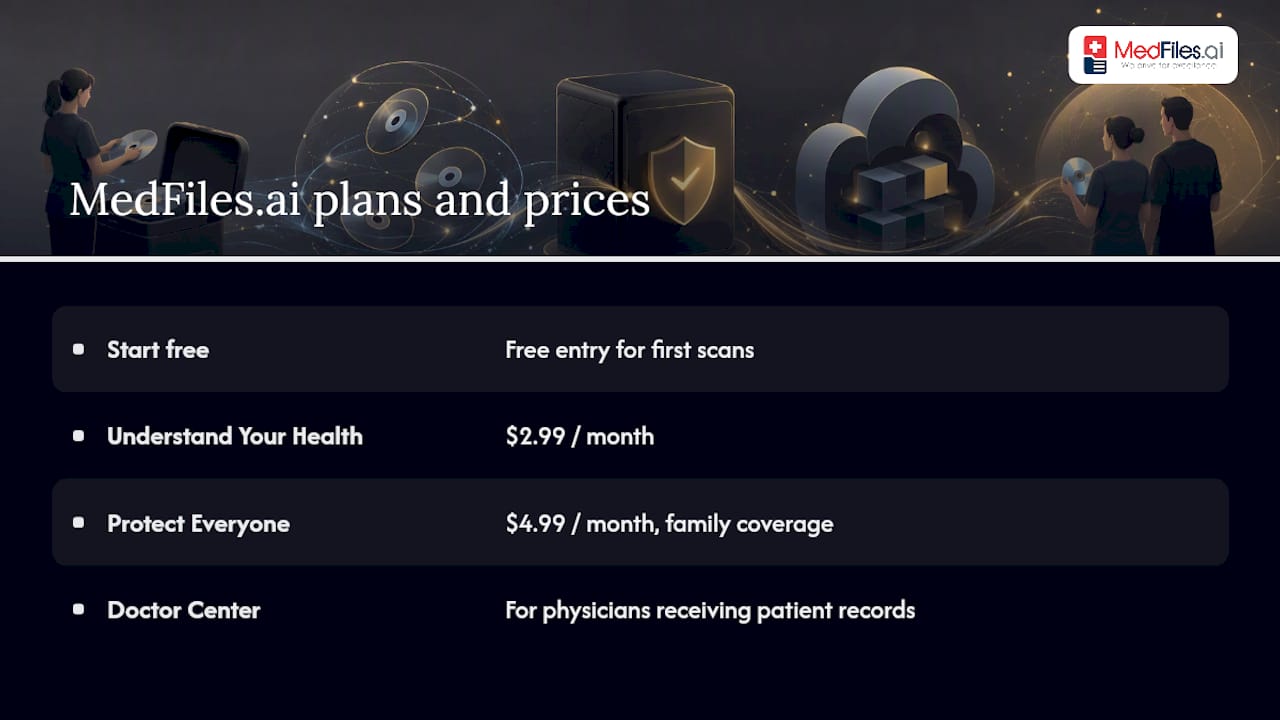
Plans start with Start free for getting your first scans organized, with Understand Your Health at $2.99 per month and Protect Everyone at $4.99 per month for full family coverage. If you’re a physician receiving records from patients, the Doctor Center is built for that side of the exchange. Check the pricing page and pick the plan that matches how many people’s records you’re managing.
Sources
For readers who want to go deeper or share documentation with a clinician, a few sources are worth bookmarking:
- Experience with Importation of Electronic Images into the Medical Record from Physical Media
- DICOM: Using CDs for image exchange
- Hospital gave you a scan CD? Here’s how to open it · OpenMyScan
- Impact of cross-enterprise data sharing on portable media with decentralised upload of DICOM data into PACS
This article is general information, not a substitute for advice from a qualified doctor. Consult a qualified healthcare professional about your own circumstances before acting on anything here.
FAQ
Do I Need Special Software to Open a Medical Imaging CD?
You need a DICOM-capable viewer or a browser-based viewer, but not the launcher that came on the disc, since those often fail on current operating systems. A browser-based tool lets you preview the copied folder without installing anything.
Is It Safe to Email Medical Imaging Files to a Doctor?
Standard email is not a secure way to send protected health information, since it isn’t encrypted end to end and can sit unprotected in an inbox. Use a secure portal, a HIPAA-ready share link, or an encrypted file with the password sent separately instead.
How Long Do Imaging CDs Actually Last?
Optical discs can degrade over time and the viewers burned onto them often stop working within a few years as operating systems change. That’s why migrating important studies to a secure digital archive rather than relying on the disc itself is the safer long-term plan.
What Should I Do If My Imaging CD Shows the Wrong Patient’s Name?
Do not attempt to edit or merge the files yourself. Contact the imaging center immediately so they can investigate and issue a corrected disc or secure download, since identity errors need to be resolved at the source.
Does MedFiles.ai Keep the Original DICOM Data Intact?
Yes, MedFiles.ai is built to preserve full DICOM metadata rather than converting scans into flattened images that lose clinical detail. You can start with a free account and upload your copied DICOM folder directly.